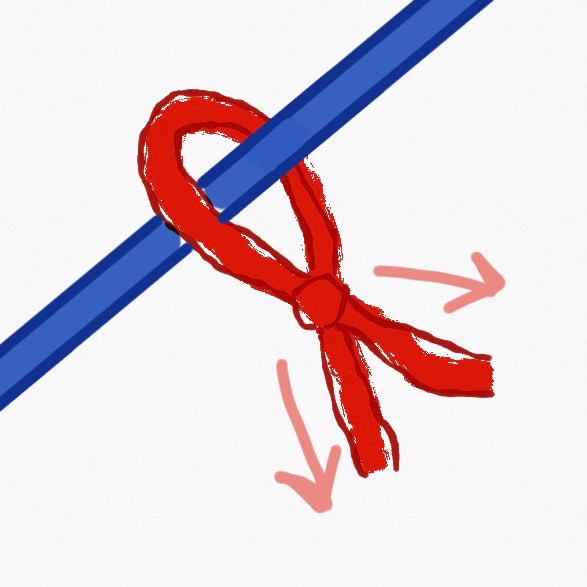
Pull a loop though the ‘e’ shape and tighten the knot
If this didn’t create a knot, it is likely you pulled the loop from the wrong side. The loop should be pulled from the back of the ‘e’, picking up whichever strand of yarn that is the bottom of the ‘e’.
Casting on
Method 1: knitting on
I believe this is the most simple cast on method, also the edge produced stretches like the rest of the work. Essentially, you are knitting stitches onto the needle.
Create a slip knot. Tighten the loop around the left-hand needle, this is the first stitch
Push needle through the front of the new stitch,
Move the yarn back, behind the right-hand needle, then forward between the two needles
Draw the right-hand needles down then push the needle forward and up, catching the loop
Enlarge the loop, then feed the front of the loop behind the left-hand needle, remove the right-hand needle and tighten the new stitch around the left-hand needle. This is the new stitch.
Repeat steps 3 – 5 until the appropriate number of stitches have been produced.
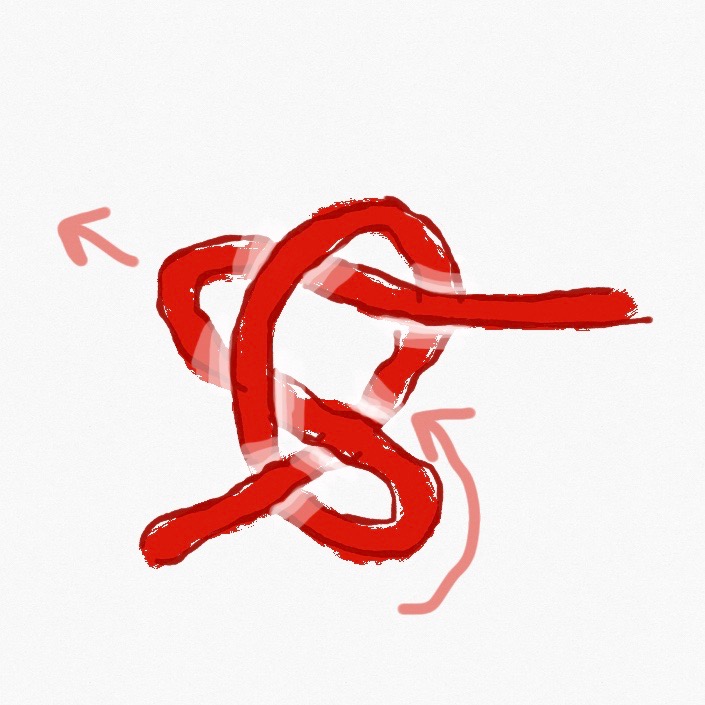
Method 2: looping on/ macrame method
I call this method the looping on method as it involves using both threads that come out of the slip stitch. This method creates a better looking edge on right-side of the project. It doesn’t stretch like the rest of the knitting and tightens easily so should be done quite loosely.
Create a slip knot with a long tail-end.
Hold the needle with the slip knot in your left hand. Grip both pieces of yarn with the bottom three fingers of the right-hand.
Insert index finger and thumb between the threads and hold so a ‘V’ shape is formed between index finger and thumb
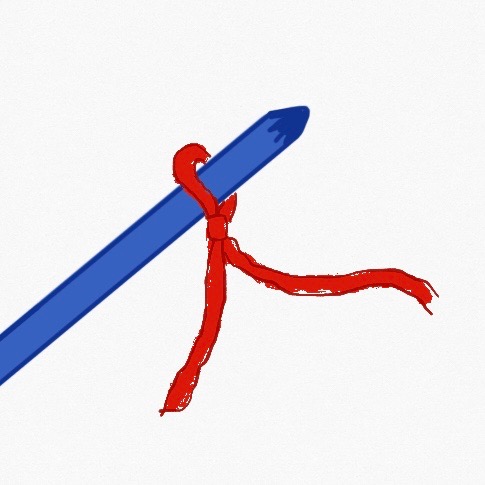
Move needle to catch the yarn that is wrapped around thumb to form an ‘e’ shape
Then, move needle to catch the yarn that is suspended in front of your index finger to create a loop that is inside of the ‘e’ made in the previous step
Gently pull both threads to create a stitch
Repeat steps 2 – 6 until the appropriate number of stitches have been produced.
Knit Stitch
Knit – this is the most basic stitch and the first stitch you should learn
Insert right hand needle backwards through the front of the stitch on the left hand needle,
Wind the yarn behind the right-hand needle, then forward between the two needles
Draw the right-hand needles down then push the needle forward and up, catching the loop
Slide the original stitch off the end of the left hand needle, you have now done a knit stitch.
Purl Stitch
Purl – this is the second building block of knitted work, helping to develop different textures.
Insert right hand needle through the front of the stitch,
Wrap the yarn round the right hand (front) needle
Maintaining slight tension on the yarn, pull the right-hand needle down and back, catching the loop as the needle is then pushed behind the left-hand needle
Slide the original stitch off the end of the left hand needle, you have now done a purl stitch.
Casting off
This is how you finish you work and get the beautiful thing you have create off of the needles.
Non Stretch method:
Knit 2 stitches together (K2tog), pass stitch back to the left-hand needle.
Repeat to last stitch
Trim the yarn and pass the yarn through the final stitch and tighten to secure.
Stretch method:
K1, pass stitch back to the left-hand needle, K2tog
K1, push left-hand needle through the front and K2tog